Wednesday, December 21, 2011

Big Sis Art Gallery

Some new additions for the big sis virtual art gallery..
In this picture, she chose to draw Mary riding a donkey with Joseph walking beside her. This was totally unprompted, so Mommy was thrilled to see that she has been listening to the Christmas story this month!

This is a self portrait. She is wearing her penguin shirt and holding an "I love you" sign. (For a preschool Mother's Day present, they took pictures of the kids holding an "I love you" sign - hence the inspiration.)

Elf on the Shelf Present

Evidently, Pop Bubble learned that other elves (Peter and Elfie) were being allowed by Santa to share some magic elf seeds. One morning we found him hiding in a tea pot with the letter below from Santa (if you read closely, evidently Santa had a late night...I think he meant to say "should" instead of "took").


The girls planting their elf seeds...

After following the directions, here's what we found the next morning!

Small bell wreath

Saw one of these hanging at Michael's and the supplies were on sale, so decided to give it a try!

Supplies needed:
Bells
Wire (I used floral wire an it was way too weak - I plan to get something thicker or see if I can cut down a wire hanger)
ribbon or other adornments

I already had a silver version of this that I received as a gift. We usually hung it from a door knob so the door jingled every time the door opened, until one day the dog destroyed it. Very easy to make! Kids could make it for a teacher or grandparent or something (with a little help).

Just string the bells onto the wire, twist the wire together to close/shape into a circle, then add ribbon/raffia/twine/whatever to adorn it and make a hanger if desired.
I'll try to fix mine and get a finished picture. I loved the fun colors (even though they don't match any of my Christmas decor) and used a sparkly purple ribbon to make a bow and a circle hanger.

Glitter votives

These weren't anything spectacular, but can look quite pretty and would be fun in bright colors in the right room. I had purchased tea lights through a dance fundraiser for big E's preschool teachers and wanted her to help with part of the gift, so we came up with this project!

Supplies needed:
glass votive cups
Mod Podge
sponge brush
fine glitter
possibly a spray sealant

Apply Mod Podge to the outside of a votive cup. Sprinkle with glitter and let dry. I opted to add a spray sealant to keep the glitter from coming off every time I touched it, although it does slightly alter the sparkly effect (still sparkly, just one shade duller?). We made some of these in my MOPS group a few years back, only we also rolled the cups in small sparkly beads. It looked pretty, but the beads did come off fairly easily.


Sunday, December 18, 2011

Update to purse notebooks

I decided to make purse notebooks as a little something extra for my nieces' Christmas presents. I made them similarly to my original blog post, but found a helpful change. This time, instead of making the "buckle" out of cardstock, I used a wide, grosgrain ribbon that I had on hand. This works really well in terms of keeping the notebook thin and it also won't tear. we had issues with the cardstock tearing when my little ones would open and close their notebooks. I still don't know how well it will keep over time. I hot glued it and just don't know how well that will keep. Regardless, I like the way they turned out and thought I would share the alteration.


Easy Christmas Card Display

This idea came from Caroline over at Oh Pickles and it's one of those simple ones that makes you want to hit yourself upside the head and go, "Why didn't I think of that!?"

Supplies needed:
nail
sturdy/wide ribbon
clothespins (I used mini ones)
possibly scrapbook paper and Mod Podge
If you make your own bow - pipe cleaners or whatever you use to make it

Basically, just tap a nail on the inside of your coat closet (or other closet). Tie your ribbon to the nail then string it up over the door so it hangs on the outside. If you wish to make a bow to add, go for it. Clip your cards to the ribbon as they arrive! You can also mod podge (or decoupage as you fancier crafters prefer to call it!) some scrapbook paper on the paper clips to make them look a bit fancier.

I love that you can use this idea year round just by changing up your ribbon. It seems like we have a card-giving holiday each season...so fun! You could also just clip paper crafts or artwork that your kids do for that particular season instead. What a fun way to dress up a door!

(Side note: My pictures were taken at the beginning of the Christmas season, so I had to hang some of our Christmas cards up for effect...it looks even better now that it is more covered!)

Christmas Crackers

In college and for a few years after, I worked in a tea/gift shop and most Christmases, they sold packages of Christmas Crackers. I always thought they looked so pretty and would be fun to set at Christmas dinner table, but was never quite willing to fork over the money for them.

Turns out, they are pretty easy and can be inexpensive to make! (Some versions actually pop when you open them...my version does not.) I made them to take to my extended family Christmas celebration, as well as gave some to thank my daughters' Sunday school and nursery teachers.

Supplies needed to make them like mine:
**empty toilet paper rolls or other tubing
**glue and/or tape
**wrapping paper (I bought some at the Dollar store, but if you plan ahead and don't mind storing it...you can reuse any of the big scraps torn off packages when you open presents)
**curling ribbon
**scissors
**fillers of your choice (I mostly used candy plus a lip balm for some, but could use little toys, matchbox car, a bunch of crayons, etc.)

First, I cut out wrapping paper wide enough to wrap around the tube and 2-3 inches longer than each toilet paper roll. I glued the roll to the wrapping paper so that when my recipients opened their crackers, they hopefully won't realize I used a toilet paper roll..ha!
Next, I used a piece of ribbon to tie one end of the wrapping paper and added my fillers.
Finally, I tied off the other end and curled the ribbons.


They make cute stocking stuffers too!


Elf on the Shelf

While I really try to down play Santa's Naughty List and focus more on connecting Santa to the real meaning of Christmas, I do love Elf on the Shelf. Growing up, my grandmother had this funny looking elf that hid in her rhododendron year round, so I can't help but think of her. Plus, it's just a lot of fun!

Our girls named their elf Pop Bubble this year. (If you only could have heard their wild other choices...) He started out the year fairly tame, but recently has been more adventurous. Perhaps he is starting to miss the North Pole. Maybe he is just getting more excited for Christmas! Thought I'd share two of his recent antics...

I didn't get a picture of it, but this morning we found him making a snow angel in a pile of sugar on one of our cookie sheets.

Earlier this week, he was discovered putting together a mini disney princess puzzle (he kept adding pieces throughout the day).

My favorite of the week was turning the milk green/hiding in the fridge. (Hiding in the fridge actually concerned big E a bit - if I recall correctly, I think she was worried he had died! I reassured her that perhaps he is just a little homesick for the North Pole, where it is really cold all the time!)

I just love his ornery little eyes looking up at the milk!

I wonder what kind of mischief or fun he'll be up to tomorrow!

Tuesday, December 6, 2011

crafting ideas

So I told myself I WAS NOT going to check out pinterest, but then in a moment of weakness I hopped over. Wow. I could easily waste way too much time over there! Crafts and fun ideas galore at the click of a mouse! I have been wait listed for now, but that didn't stop me from setting a timer to look for fun ideas. Below are a few on my list!

Mind Jar: I actually saw this a while back and saved it in an email to make later. I think it is now time. Little E can throw some good fits and often has a hard time self soothing...thinking this jar might do the trick.

Christmas quote: Saw this quote...so cute! "Each of us is an Innkeeper who decides if there is room for Jesus. -Neal A. Maxwell" -Would make such a neat sign. (The link was to an etsy store that sells it in vinyl lettering - the shop is VinylLettering.)

I grew up having an old gumball machine in our house and have always loved the look of them. This is such a cute DIY version - so easy too!

Coasters: I've seen lots of coasters made from tile ideas, but I never would have thought to mod podge on a napkin! So fun!

Okay - going to call it quits now - time to do my Advent devotional!!

Monday, December 5, 2011

Tote Bags

Got this really cute idea from Oh, Pickles. (Please note: That is not a link to her instructions...just her adorable blog - lots of great hosting ideas...she is so great at the details!) I made these for my nieces for Christmas, which I plan to pair with a purse notebook and another little something. Both love to play school, so I figure at the very least these could become their teacher bags/notebooks!

Supplies needed:
Tote bag (I got mine at Hobby Lobby)
Paint (I used fabric paint)
Paint brush (I used a small paint brush - sponge brush might work and turn out cute too)
Paper doily (I used Wilton 12-inch diameter)
Might also use: spray adhesive, stencils (I made my own), ribbon


First, place a doily in the bottom right corner of the bag and paint in all of the holes that show on the bag. Oh, Pickles recommended lightly spraying an adhesive to hold the doily in place. If you choose to do this, use caution...too much adhesive and you will not be able to remove the doily at the end! I was too nervous, so I just chose to hold mine in place. It worked fairly well for me, though the edges were really hard and I did make a few minor mistakes.


Next, either use a stencil, freehand or make your own stencil to paint the initial on the bag. I opted to make my own stencils by typing my initials on Open Office then printing them on cardstock. Next, I cut out the black part of the letter to create a stencil. Another trick is to print it on regular paper, trace it onto wax or parchment paper, use an exacto knife to cut out the letter and then use the wax paper as a stencil.


Finally, dress up any other way you please. I found some ribbon on clearance that blended well and opted to tie a piece on one strap.
Twine would look really cute on some bags too - possibly with bells tied on at the ends? Lots of possibilities for fun!! Perhaps you could even cut out a non-fraying type of fabric in a quarter circle and fit it inside the doily on the bag for an added splash of color? The possibilities are endless!! Such a cute fun idea...here's hoping my nieces like it as much as I did!

Sunday, December 4, 2011

Christmas Countdown with Books

No pictures for this post and I know I mentioned this idea once before, but had to post about it again as we are loving it! We started a new Christmas Countdown tradition this year. I've probably accumulated about 10 or so children's Christmas themed books over the years. I checked out enough books from the library to have 25 books on hand. I "wrapped" each book in fabric (I couldn't bring myself to waste that much paper - we can reuse this fabric year after year). Each day, we unwrap a book and enjoy quality time reading. The girls and I really look forward to this time together. I tried hard to make sure at least a third of the books were renditions of the actual Christmas story, another third or so were closely tied to the story, the final section are a little more fun - Santa related, etc. (think Polar Express, Twas the Night Before Christmas). I don't have a book for Christmas Day yet, but I'm planning to stick a Bible in there and finish our countdown with the best book of all!

I'll try to come back and comment on some of our favorites. We are just a few days into it. We did read Snowmen at Christmas tonight and I always love that one - it barely ties in the Christmas story, but the illustrations are beautiful and it's such a cute idea.

Thursday, November 10, 2011

Christmas or Birthday Countdown

I've seen several of these on the internet and decided to make one of my own. Seeing as I received a Christmas Countdown/Advent calendar as a Christmas gift one year, I opted to make a birthday one. I know big sis gets so excited around her birthday - perhaps this will eliminate the, "Is it my birthday yet?!" question!

Supplies needed:
Muffin tin (mini 24-count for a full Christmas one, size of your choice for birthday)
Cardstock and either scrapbook paper/embellishments or a computer program
magnets (I bought an adhesive roll)
possibly glue

If you choose to use scrapbook paper:
Cut cardstock circles out in a size large enough to cover the muffin tin holes. I just used a variety of glasses to make the circle shapes. Decorate as you see fit, adding the countdown numbers as well.

If you choose to use the computer: Design your circles and print onto cardstock.

Cut little pieces of magnets and attach to the backs of each circle. I ended up gluing mine on as the adhesive didn't work well.

Overall, my circles ended up being a little stiff and they don't always lay well over the muffin cups. Possibly using lighter weight paper, adjusting the circle size, or using more powerful magnets would help eliminate this problem.

Fill each muffin cup with a special surprise, cover with the circles and let the countdown begin!

Do It Yourself Tiered Plate Stand

When I saw this tiered stand blog, I knew immediately I wanted to try it. Another neat take on it can be found here, although you would likely need to buy a few more supplies.

I love tiered stands, but they take up so much storage space and can get pricey. Here's a way to make your own that you can change with the seasons/occasion and keep low cost (I know I spent less than $10). (You may want to see her directions as she was better at remembering to photograph each step!)

Supplies needed:
Two different sized melamine plates (make sure they have a decent ring on the bottom)
Threaded rod (hardware store)
4 nuts to fit your threaded rod and maybe 1 stop nut
Drill
2 Bic pens
Paint

Take apart the pens - you only need the tube that covers the ink. Paint it whatever color you wish. These tubes will cover the metal rod as you assemble the stand. (I recommend spray paint. I used acrylic and it chips off easily unless you coat it with a sealant or something.)

Drill holes in the center of your plates. I used some markings on the back to find the center, but you may want to measure. You'll want the holes to be pretty exact so the two plates line up nicely. I've read of others having problems cracking their plates when too much pressure is applied while drilling, but I did not have trouble. Some of the plates took a while to drill through, however.


Run the threaded rod through your larger plate and hold it there by placing a nut at the bottom making it even with the plate's rim. I do not recommend a stop nut as they are thicker. Most of the plates I've seen don't have a very wide rim that will work with a stop nut.

Next slide on one of the pen tubes and top it with a nut.

Slide the second, smaller plate on top, screw on another nut, then add the other pen tube. Lock everything in place with a nut.

Finally decide how you want to top it. The original post sawed off the excess rod and tied a ribbon to the top. I bought two different wooden bead type things, painted them white, hot glued a stop nut inside one of the beads to serve as the cap. I plan to tie a ribbon in the small gap that remains. (When I have access to a better saw, I may also just saw off some of the rod.)

TIPS:
If the bottom plate isn't deep enough, the whole stand will be wobbly as it tries to stand on the small nut. One remedy if you face this problem: use little felt anti-scratch tabs (like the ones you put on the bottom of chairs to keep them from scratching the floor) around the rim to get the plate a little further off the ground.

Mine sometimes becomes unscrewed a little easily so I might try adding a nut below and above the upper tier plate. I'm also wondering what would happen if you painted the bolts.

It is a bit of a pain to screw/unscrew, but it's worth it to me as it has saved money, is easier to store and gives lots of fun options!

Wednesday, November 9, 2011

Ornament Wreath

I've always liked the ornament wreaths you can buy around the holidays, but not enough to purchase one. However, when I stumbled upon do-it-yourself directions, I was determined to make one! I cannot remember the original blog I read this on, but there are lots of other examples and posts on this project. Here's how I made mine:

To keep it cheap, purchase your ornaments after Christmas. I bought 3 boxes of small ornaments for around $5 I think. I know they cost $5 each regular price at Target. (Although I wish I would have purchased 4!)


Supplies needed:
Wire hanger
Ornaments (how many depends on size you want to make...deciding how many to purchase is the hardest part!)
Possibly ribbon (I actually found mine at the Dollar store!)

Untwist your wire hanger and form it into an open circle. Start stringing on your ornaments.
Once full enough for you, twist the wire together again at the top. If desired, you can make a loop with the wire for hanging. I used pliers to help me as my hanger was a really stiff one.

If you wish to add ribbon - go for it. I made a bow and attached it with pipe cleaner, then used some extra ribbon as a hanger...not sure I will keep that part. We'll see how it looks this Christmas!

Saturday, October 22, 2011

Jack O'Lantern Luminaries

I've seen these before on the internet but had not taken the time to try it out until a recent MOPS (Mothers of Preschoolers) meeting. (I was trying to make mine just look like a pumpkin so I could keep it out even around Thanksgiving...green tissue lines would've looked better than the black construction paper, but that was all that was on hand at the time.)


When my girls saw my craft at home that afternoon, they instantly wanted to make one themselves! This craft could easily be tweaked in so many ways and was fun for us to do together!

Supplies I used:
plain canning jars or votive cups, etc.
Mod Podge
Tissue paper
Black construction paper if you wish to make a Jack O'Lantern

At our meeting, we used jars. The only canning jars that I had on hand were not smooth on the outside, so we had to settle for the next best thing - votive holders. That turned out to be a good thing, as my girls (the littlest one especially) grew a little impatient with applying the glue.

Pick tissue colors and cut into strips.
Apply Mod Podge to small portions of the outside of your jar and place the tissue strips on top. Continue until entire exterior is covered.


If you wish to make yours a Jack O'Lantern, cut a face out of black construction paper and glue it on.
Finally, paint a layer of Mod Podge on top. Let dry and you are done!


I dropped some battery operated tea lights in mine and my eldest loves keeping hers by her bed!


Happy crafting!

Monday, October 3, 2011

Family Rules

While checking out some other blogs, I stumbled across "Family Rules" and thought that was such a neat idea...and perfect for the huge blank space currently on our family room wall! After looking at many ideas and brainstorming on our rules, I ended up making mine as follows. Overall I am happy with the way it turned out, but please know that there are some much cheaper ways to make super cute versions!

Supplies I used:
Canvas
Scrapbook paper
Scrapbooking letter stickers
some ribbon/trim I had on hand
Mod Podge

Basically, I cut strips of scrapbook paper and mod podged it on. (There is a seam in the middle of my canvas obviously because the scrapbook paper wasn't wide enough).


Next, I "wrote" the rules using the stickers. Finally, I added my trim/embellishments and also took some leftover scraps around the edges of the canvas to create a sort of border.

I originally read about this project at the Pleated Poppy. She also opened a linky party - great way to see many different takes on this project and brainstorm rules!! It was lots of fun!

Friday, August 5, 2011

Travel Activities

We've been trying to make our car trips without televisions. (I've never been crazy about using them, but with two infants/toddlers that were not great travelers, the TVs were worth our sanity and the safety of our family.) We've been doing pretty well using books, toys, and coloring books, but I was so excited when I saw these travel binders over at Somewhat Simple.

As excited as I was, I didn't jump at the chance to make them. Regular dry erase markers DO NOT come out of clothing (at least, I couldn't get them out) and my girls are notorious for drawing on their bodies and getting markers on their clothing by accident. However, this fall I noticed that Expo now has a line of washable dry erase markers (and they were on sale with school supplies!!), so it was time to give this a go. (I also bought some washable Crayola dry erase crayons, but have yet to test them on the binders. Crayons aren't great for travel with this hot weather!! Too many bad experiences with melted crayons in the car!)

Needless to say, Big Sis LOVES her notebook and will remain quite busy with it. Little Sis loses interest after a while, but she still thinks it is fun.

Cheapest time to make these is likely in the fall/back to school when you can buy all of the supplies on sale!

Supplies needed:
binder or scrapbook
sheet protectors
either printer/paper to print sheets from the web OR
purchase workbooks
dry erase markers (or possibly crayons)
OPTIONAL:
pencil holder with binder holes
coffee filters or tissues or something else to serve as an eraserFairly easy...simply print or tear out worksheets from a book, slide into the sheet protectors, add them to your binder and you are ready for travel! I plan to have each girl color a favorite character for the front of her binder.

Worksheet possibilities:
This activity is pretty easy to gear up or down to your child's age. Some possibilities: coloring pages, connect the dots, finish the picture pages, mad libs (buy a book or print some for free online) for older children, letter and number tracing for the pre-K/K crowd, color by number if you have enough markers, etc.Where I found my worksheets:
Workbooks from the Dollar Store/Target Dollar Aisle
Customizable handwriting worksheets
Preschool Worksheets
DLTK usually has a lot of printables to choose from, but I haven't printed from there yet...Other examples (besides Somewhat Simples):
Simple, Messy, Fun
Feels Like Home
Try This!

Friday, July 29, 2011

Notebook Purses

When I saw these journals at Sisters' Stuff, I knew at some point I'd be making them for my girls! With school supplies on sale, this seemed like the perfect time! (Please note, theirs are much cuter due to the additional embellishments...I didn't want to sink too much money into these as I know my little ones will burn right through them.) (There are some other cute examples at Brassy Apple)

Supplies I used:
Composition Notebooks (mini and regular sized examples shown)
scrapbook paper
ribbon
Mod Podge
hot glue
velcro tabs
scissors

The other site used a knife to cut their layers and I would probably recommend that, as I attempted to use scissors and just didn't get as clean a look (probably took me longer). The first step is to cut corners off your notebook to make it shaped like a trapezoid. (I just winged it on mine, so for those perfectionists out there...sorry I don't have specific measurements for these cuts!)

Next, I applied the scrapbook paper using Mod Podge. (For me, it was easier to just glue the notebook cover to the paper and trim after, but you could measure or trace it out then glue.)

I hot glued ribbon on each notebook for decoration and also for handles.

Finally, I cut out a rectangle of scrapbook paper, hot glued it to the center of the back cover, folded it over to the front side and attached velcro. (I had sew on velcro on hand and opted to try hot gluing, but would likely recommend the self-adhesive velcro dots or something to that effect.)

I like the example on the other blog - so cute with the flower on the closing tab!

Pretty easy and fun project. I can't wait to give it to big or little sis! Big sis LOVES to draw, so I know she will go through hers fast!

UPDATE: Check this post for another way to close the purse (I ended up calling it a purse buckle..???)

Sunday, June 19, 2011

Cake Pops

After reading about cake pops, having them available at a Mother's Day Tea (big sis was so sad she couldn't eat them because they had nuts in them!), and then having my mom make some for a family birthday party...I knew I wanted to give it a try. My mom owns a cake pop mold, so hers are strictly cake centers with icing on the outside. Big sis loved them, but alas my husband didn't get to try any since she made hers with chocolate cake. For Father's Day, I decided to make some using Daddy's favorite type of cake...strawberry!

I opted to follow directions from Bakerella - not sure if she made them originally, but she WAS featured on Martha Stewart and quite possibly is responsible for them becoming so popular. If you've never been to her site, she has SOOO many cute versions! Oh if I had extra time on my hands...!!!!

Here's how my girls and I made ours (and the final product review):
Supplies/ingredients:
lollipop sticks (I bought 6 inch ones, but found that the smaller sticks I had on hand worked just as well)
floral foam (or something to hold the pops upright without touching as their icing dries)
waxed paper
cake mix and necessary ingredients to bake it (we chose strawberry)
1 can cream cheese icing
vanilla almond bark or vanilla meltable candies or even chocolate chips?
Decorating sprinkles

Directions:
(Side note: My girls only helped with the last step - they added the sprinkles (well, little sis sprinkled the floor more than her cake pops!). The rest I did during rest time...but they easily could have helped.
1. Bake the cake according to directions (I made mine in a 13x9 pan). Let cool completely.
2. Crumble cake into bowl. Add icing and mix. I personally wanted the least amount of icing mixed with the cake mix, so I just added a little bit of icing at a time until I thought the consistency would hold up and the cake balls would stick together. (Probably used the equivalent of one cake and 2/3 or 3/4 can of icing.) (I also only used about 2/3 of my cake as I didn't want TONS of cake pops.)
3. Shape the cake into balls and place onto wax paper-covered cookie sheet.
4. Melt a little of the vanilla bark. Dip lollipop sticks into the melted bark and place in the cake balls.5. Stick these in the freezer to solidify/harden.
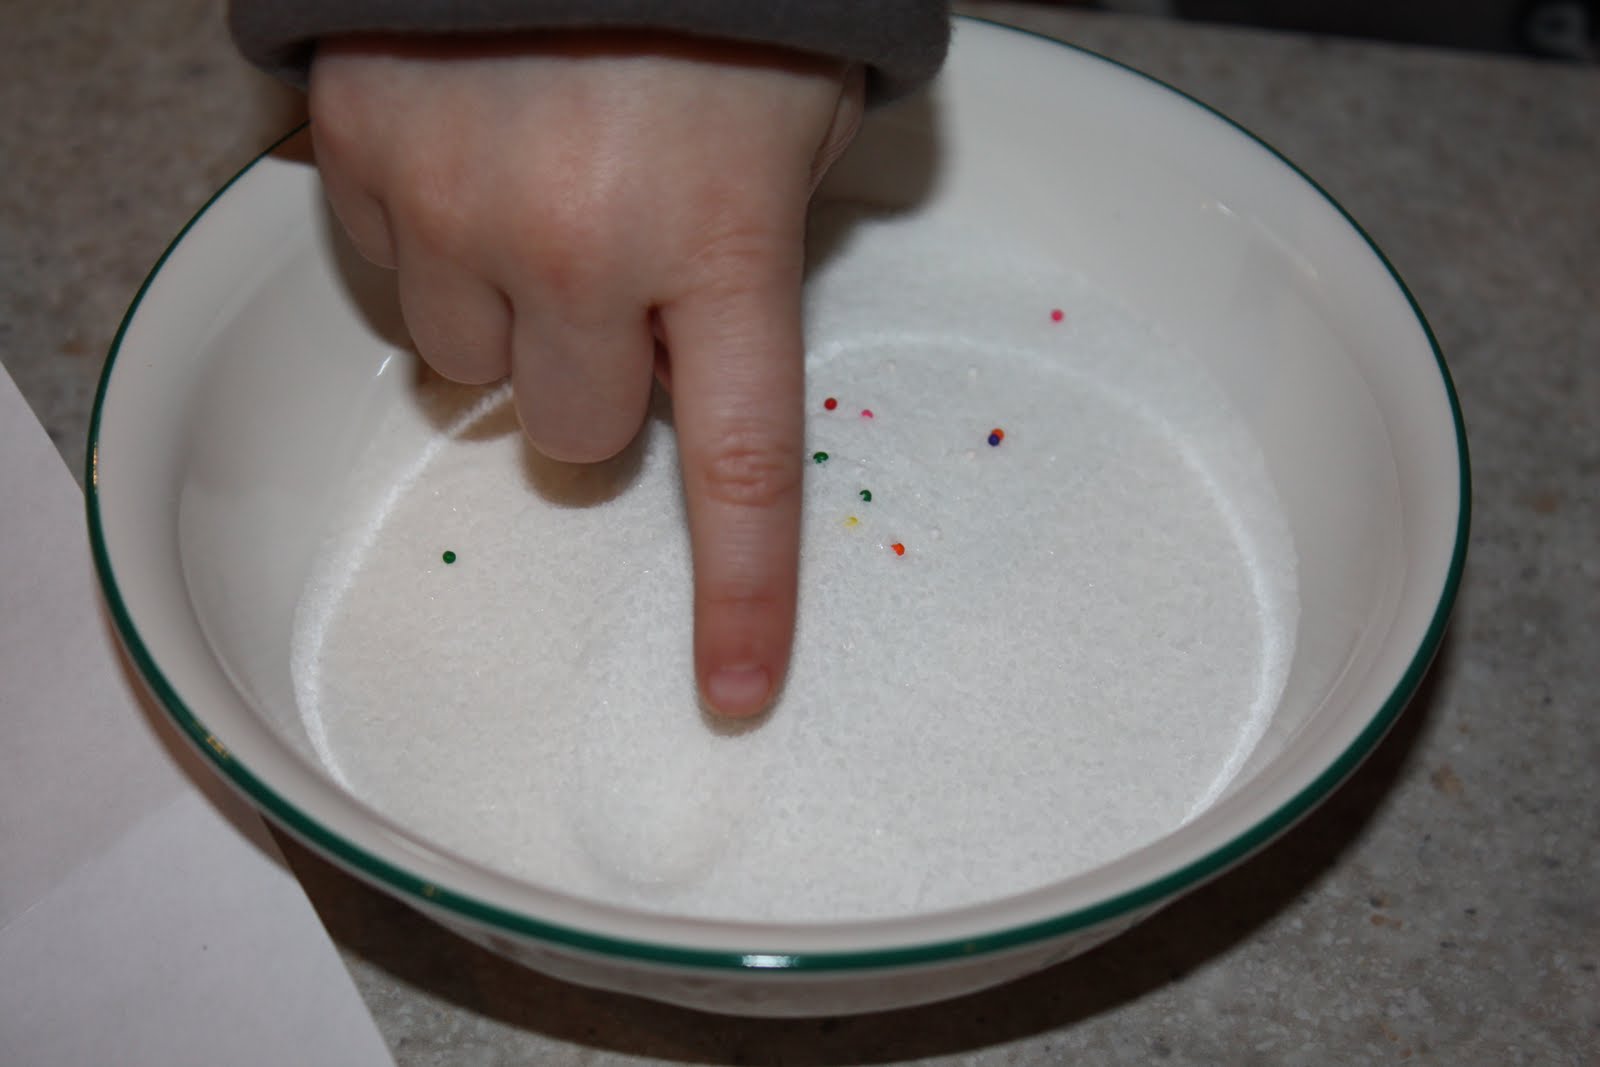
6. Melt more of your outer coating. Take cooled/frozen pops and dip them carefully in the melted bark. (They will fall apart, especially if you turn them a lot.) Tap off as much excess and place in the floral foam to dry. If you want sprinkles or decorations, add them while the "icing" is still wet.

Our family reviews:
Big sis LOVES the cake pops I coated with melted milk chocolate chips.
Daddy had the almond bark covered ones and said they are rich but really good. (I think he would tell everyone to have a glass of milk ready because you'll need it right after eating one!!)
I tried a few bites of an almond bark one - tasted "melt in your mouth" good, but not sure if I liked the after taste...contemplating just trying the Wilton candy melts next time.

Father's Day Trophy

One of my favorite crafty mommy bloggers posted a cute Father's Day Trophy craft on Kaboose. We decided to make it this year using almost entirely supplies we already had on hand (just had to buy gold paint). Here's how we made ours...

(Note, she chose to cover her cups in masking tape and then paint...we opted out of that step....)

Supplies:
gold paint
styrafoam cups (I had larger ones on hand from a ghost project...smaller ones would look cuter)
glue (I ended up just using hot glue as I already had it out for another project)
pipe cleaners (I did not have gold, so substituted black)
something for the trophy base (I used a recycled Boston Market container that I had on hand, she used a box)
something for writing the message (paint pen, puffy paint, etc.)

Much of this project I did myself, but it would be easy to involve just about any age child.

First, I had my girls each paint as much as they wanted/could of a styrafoam cup (used gold acrylic paint). I went back after it had dried to add another coat. I think it took 2-3 coats for me to be happy with the color. (Note: I DID sloppily paint the inside of the cup designated to be the upper part of the trophy.)Second, I hot glued the bottoms of the two cups together and then hot glued the top of one cup to the bottom of my Boston Market bowl. (Loved using this bowl since it was already black!)

Third, I added the trophy "label" to the trophy base. (All I had that still worked was yellow glitter puffy paint!)
Finally, I inserted the pipe cleaner into my cups. (I did knot the upper one on the inner side of the cup so it wouldn't fall out easily.)

We filled ours with mini versions of a favorite candy!

Happy Father's Day!